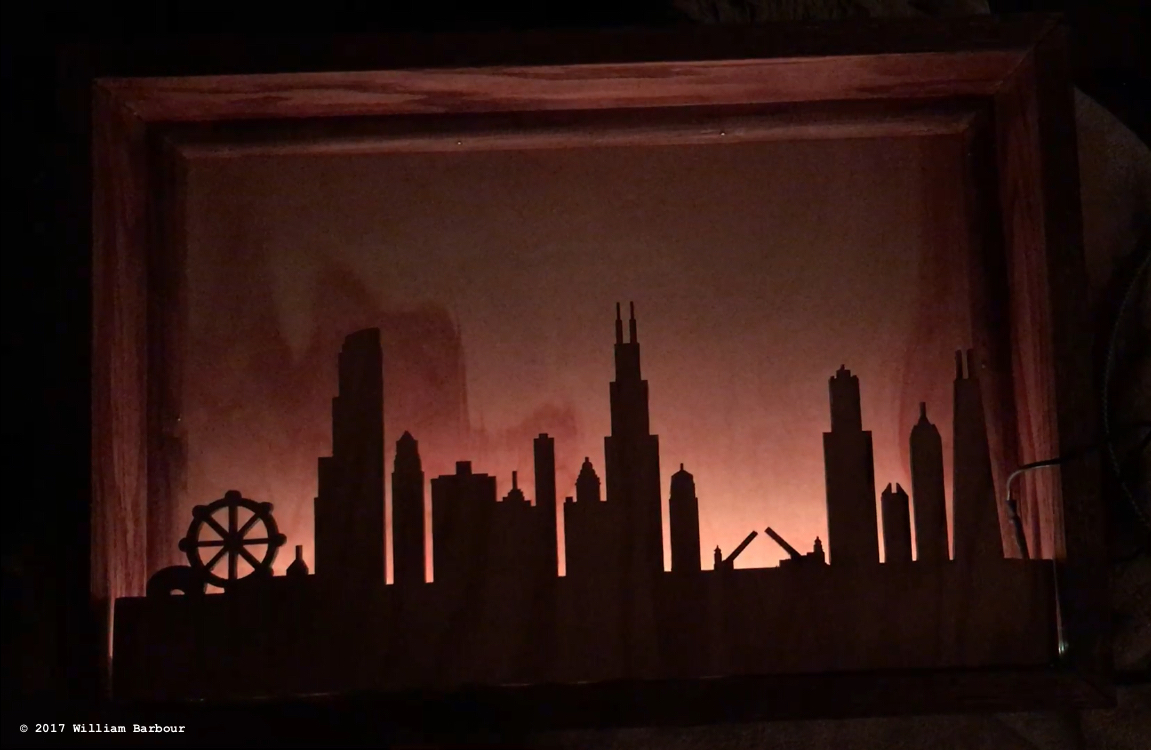
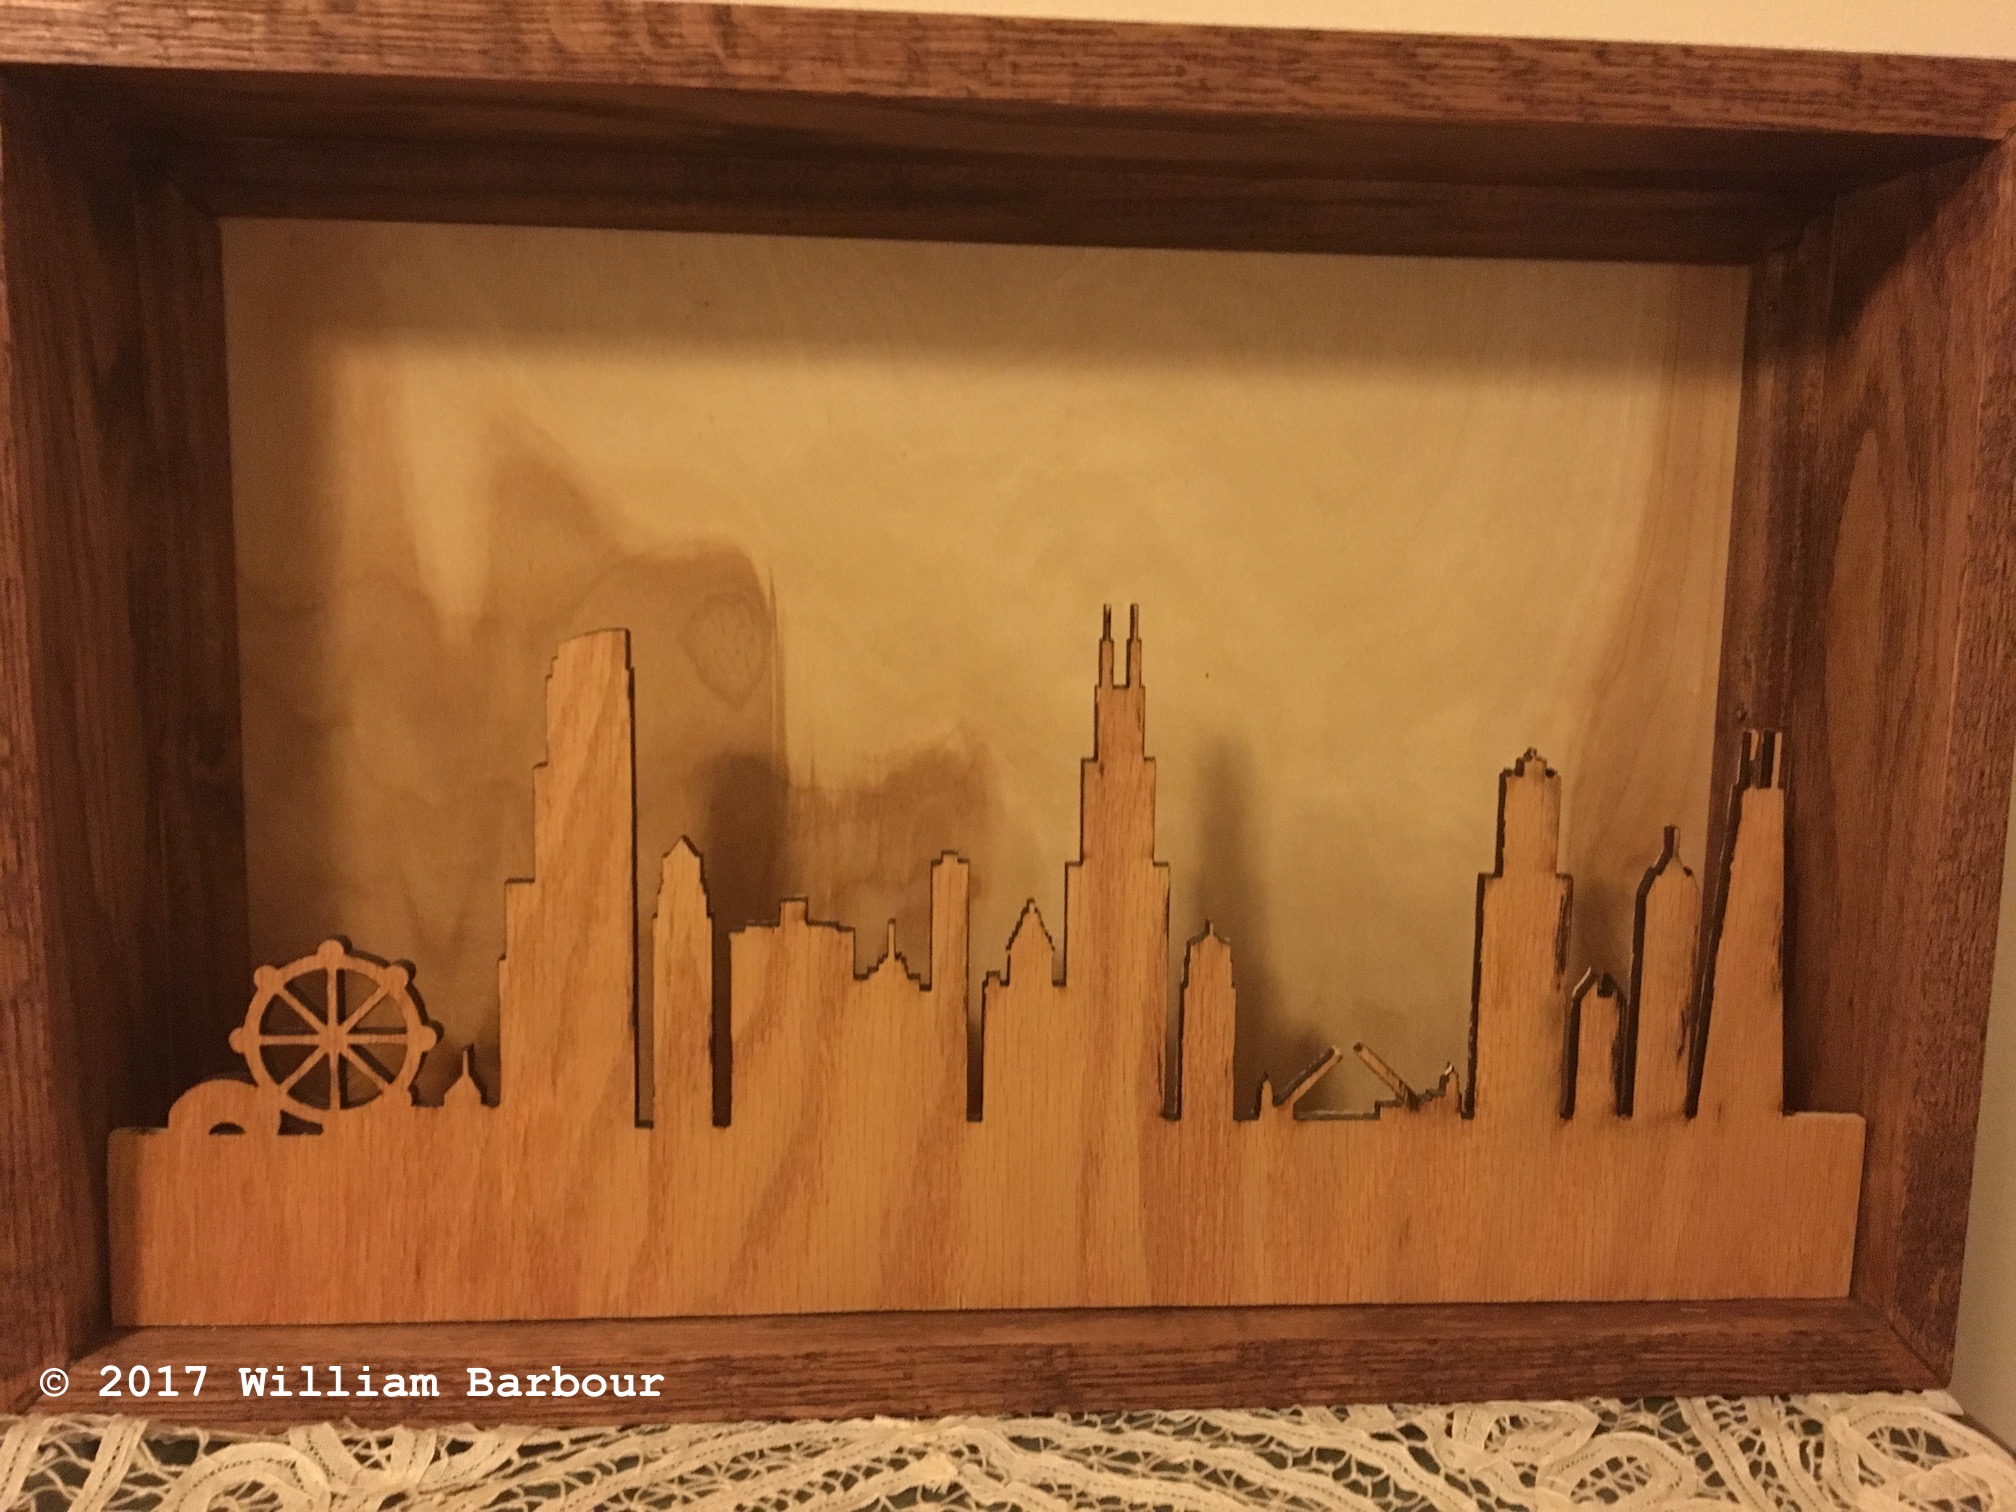
The Chicago skyline is one of most recognizable in the world and was the inspiration of this project. I set out to present the most iconic city landmarks in an accent-lighted display to mimic a sunset behind the city.
The skyline was drawn in AutoCAD, half traced roughly from a skyline image and half drawn in as a supplement to cover the remainder of the landmarks (including the Hancock Center, ferris wheel on Navy Pier, and river bridge). It took a few trials on the laser cutter to dial in an acceptable scale, since there is some exceptionally fine detail. The final cut was done on 1/4-inch oak plywood and even on full power, the laser had trouble penetrating. A couple tedious hours with a razor knife brought the cuts all the way through. I didn’t apply any wood finish to the cut skyline because it already had a beautiful color that contrasted with the other pieces.
I built the shadow box from 1x4-inch oak. I would have liked to take a router to the edges, but I don’t have one yet. The bevels were cut with a circular saw, since that was all I had at the time; they had to be done carefully to ensure the alignment was square. I also lacked a pocket hole guide at the time, so I had to free-hand drill pocket holes and counter sinks. This actually would have worked out perfectly, had I bought better quality screws. I kept the pilot holes quite proud and a few of the screws broke off in the holes due to the torque I placed on them. After cutting any protruding screws off with a Dremel and filling the holes with wood putty, the mistake was hidden. I applied two coats of red oak stain to create some contrast with the skyline but keep the grain visible.
The back of the shadow box is a piece of 1/4-inch poplar plywood with a coat of clear shellac. I recessed it from the back of the shadow box by trimming the inner perimeter with quarter-round molding, stained the same color as the walls. This was where I encountered my second mistake: the oak walls were very difficult to hammer into with finish nails after assembly of the box. Had I thought ahead, I would have nailed on the molding prior to cutting the walls with the bevel, which would have taken care of the slight gaps left by lack of precision in the miter cut of the molding as well.
The final steps were mounting the skyline using some scrap quarter-round molding and wood glue and adding a USB-powered LED strip behind the skyline. The light strip is well-hidden from the front and has a thin cord that can be routed out of the box and will plug into any standard USB charger. The color changing effect it creates is incredible in the dark.