This is a discussion of the server specifications, design rationale, and building process. I will also share what I learned during the process, along with some advice for computer building.
Update October 2019
A few months ago, I replaced the Enermax Liqtech AIO cooler due to mysterious thermal throttling issues that were occurring on the server. At the time, I did not have the extra time to track down the issue fully and needed to get the server back online, so I shipped overnight a Noctua NH-U14S TR4-SP3 air cooler. That solved the problem and CPU thermals have been low and stable ever since. I shelved the Enermax AIO and didn’t give it a second though until I came across a Gamers Nexus YouTube video detailing systemic failures in these Enermax Liqtech units due to some sort of corrosion build-up and blockage. I have not yet investigated whether this was the cause of my issues, but it seems highly likely based on their strong findings.
I have updated the parts list below to reflect the new CPU cooler - I highly recommend the Noctua NH-U14S for its simplicity and performance, even on this demanding processor.
Computer specifications
The previous research workstation computer that I built had significantly less power. It was designed for 24/7 operation with an Intel Xeon quad-core CPU (E3-1275v5) and ECC RAM. As it turns out, a lot of the computation could be asynchronously parallelized quite easily to take advantage of higher core counts. So in the second incarnation of the research workstation, I opted for a CPU in the high-end desktop (HEDT) genre where they are used for tasks such as video editing and rendering.
This led to the selection of the AMD Ryzen Threadripper 1950x CPU, which boasts high core count (16 physical) without breaking the bank or sacrificing core speed (3.4+ GHz). The Ryzen series supports overclocking and the ASUS Zenith Extreme motherboard makes this entirely possible with active VRM cooling and robust power delivery. The new configuration maintains the same high speed NVMe solid state drives via M.2 interface. Not only do these drives have extremely high bandwidth, but the input/output operations per second (IOPS) and latency are both superb1. The M.2 interface on most motherboards routes through the chipset, which can hurt latency, but the Zenith Extreme appears to route two of its M.2 slots directly into the PCIe lanes. Lower speed SATA SSD’s are used for ‘‘warm’’ storage, where data is used semi-frequently, and HDD’s for data that is accessed infrequently.
The full list of components:
- AMD Ryzen Threadripper 1950x CPU - 16 cores at 3.4 GHz base clock
- Noctua NH-U14S TR4-SP3 air cooler (previously Enermax AIO, see update above)
- ASUS Zenith Extreme sTR4 eATX motherboard
- 64GB Corsair Vengeance RAM at 3466 MHz
- Samsung 960 EVO 1TB NVMe solid state drives - hot/active storage
- Samsung 850 EVO 1TB SATA solid state drives - warm storage
- Western Digital 8TB data center HDD’s - cold storage and backup
- EVGA GeForce GTX 1080 hybrid-cooled GPU
- EVGA 1000 watt power supply (80-plus Gold)
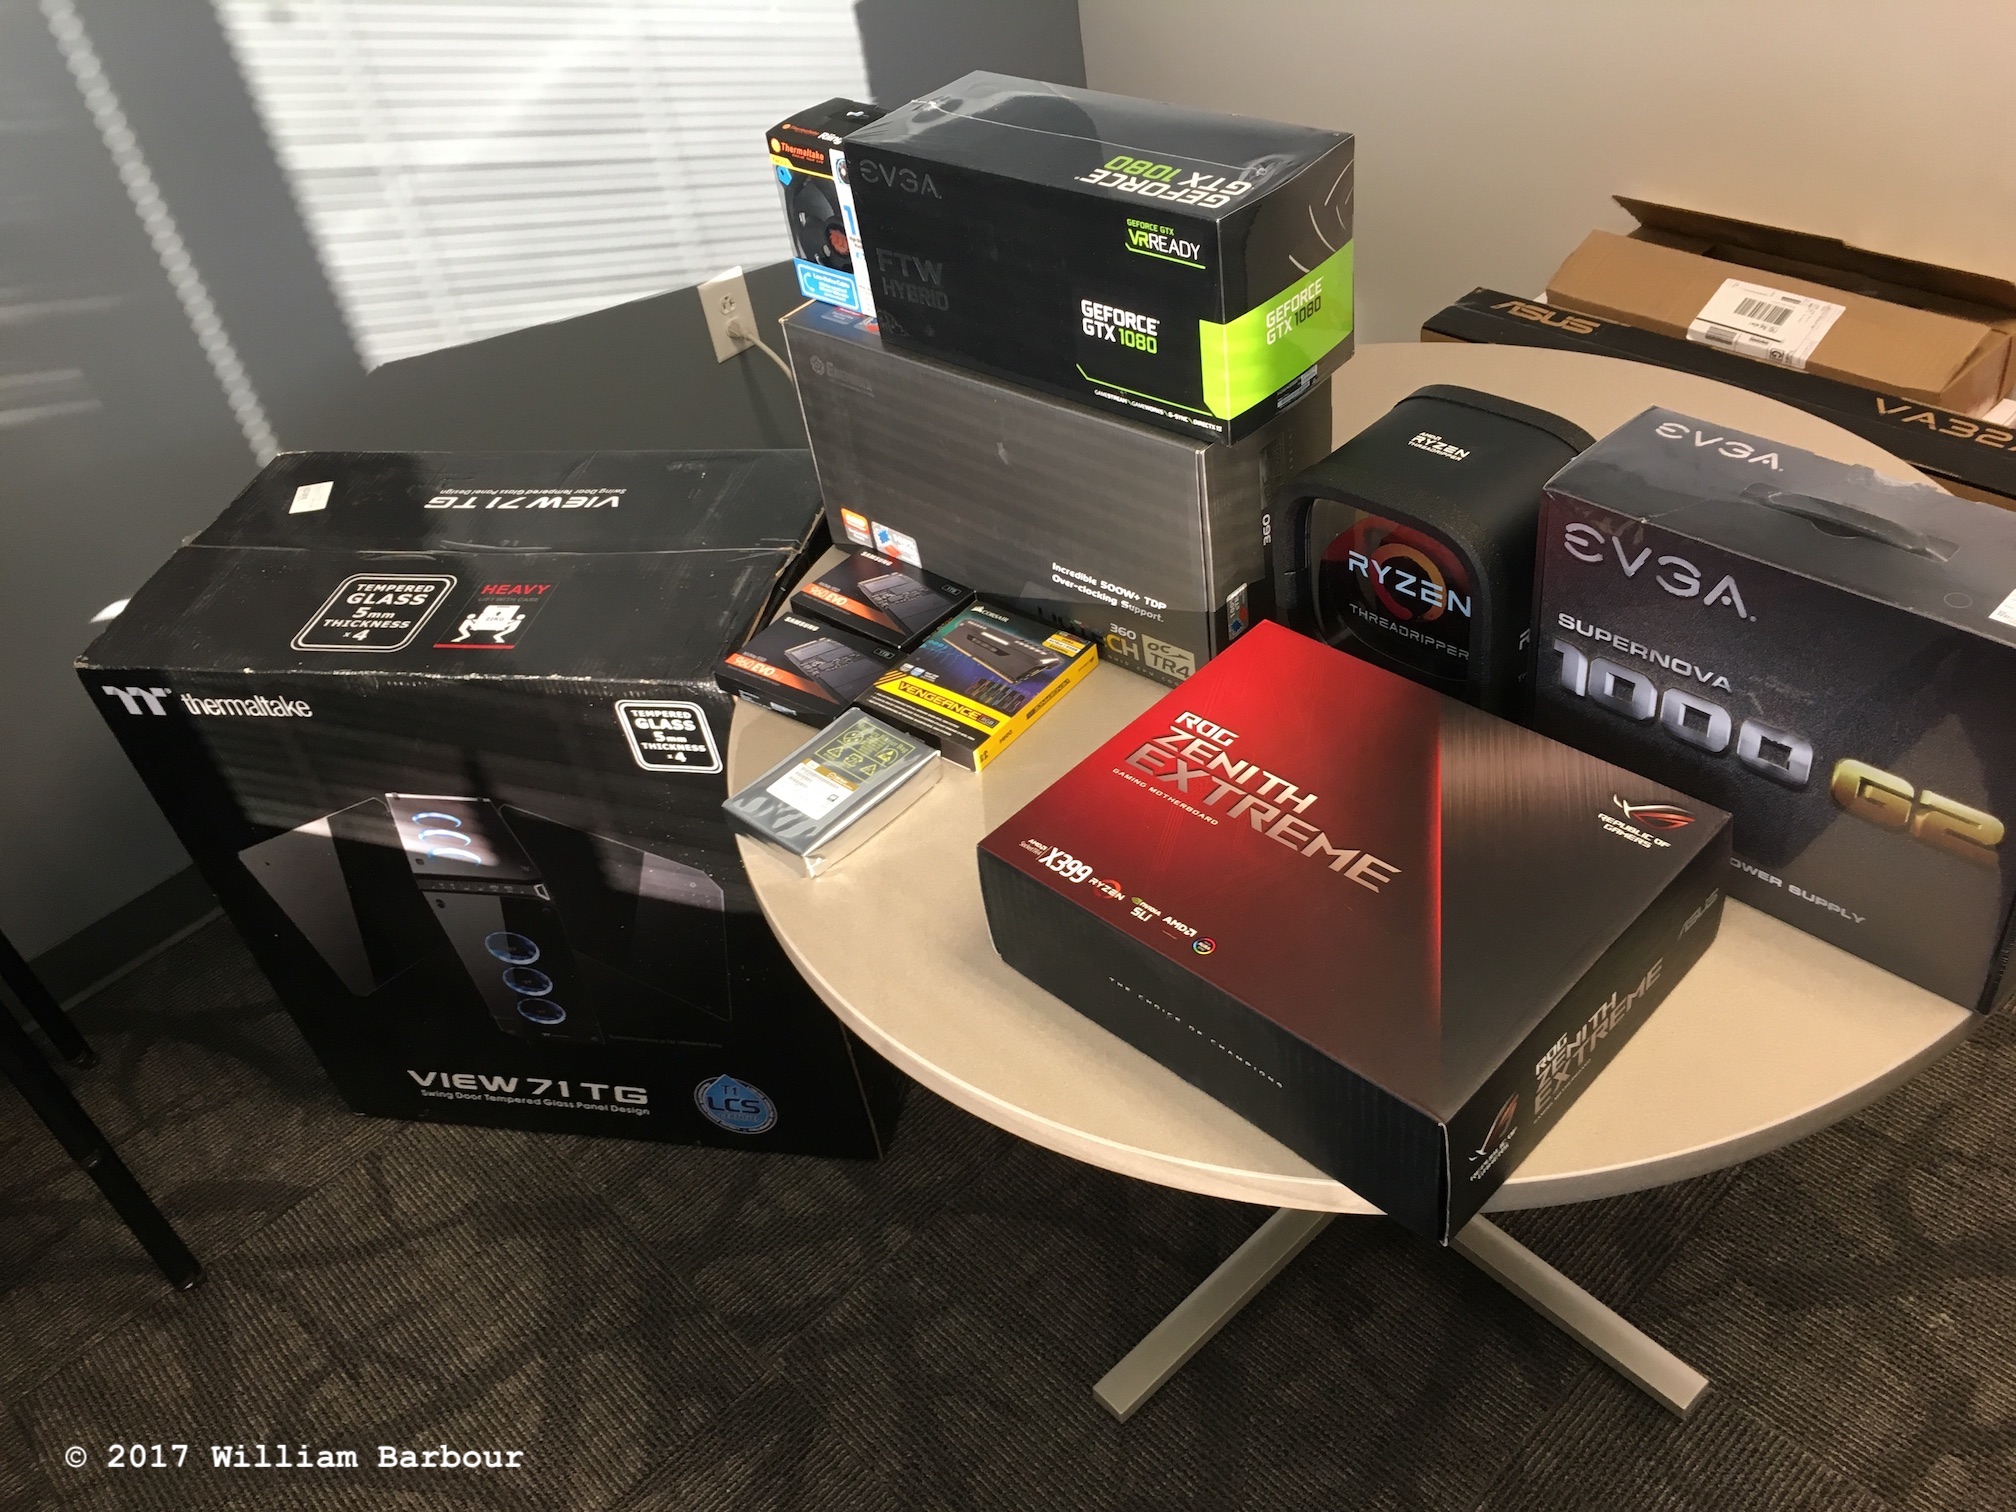
A number of components were actually tough to get a hold of at the time they were purchased. The release of Threadripper was still cooling down and the Zenith Extreme was in and out of stock. The global DRAM shortage was still in full swing so DDR4 prices were exorbitant. On top of that, cryptocurrency frenzy was really ramping up; thankfully I got the GTX 1080 before it reached its fever pitch and GPU’s were around double their intended retail price.
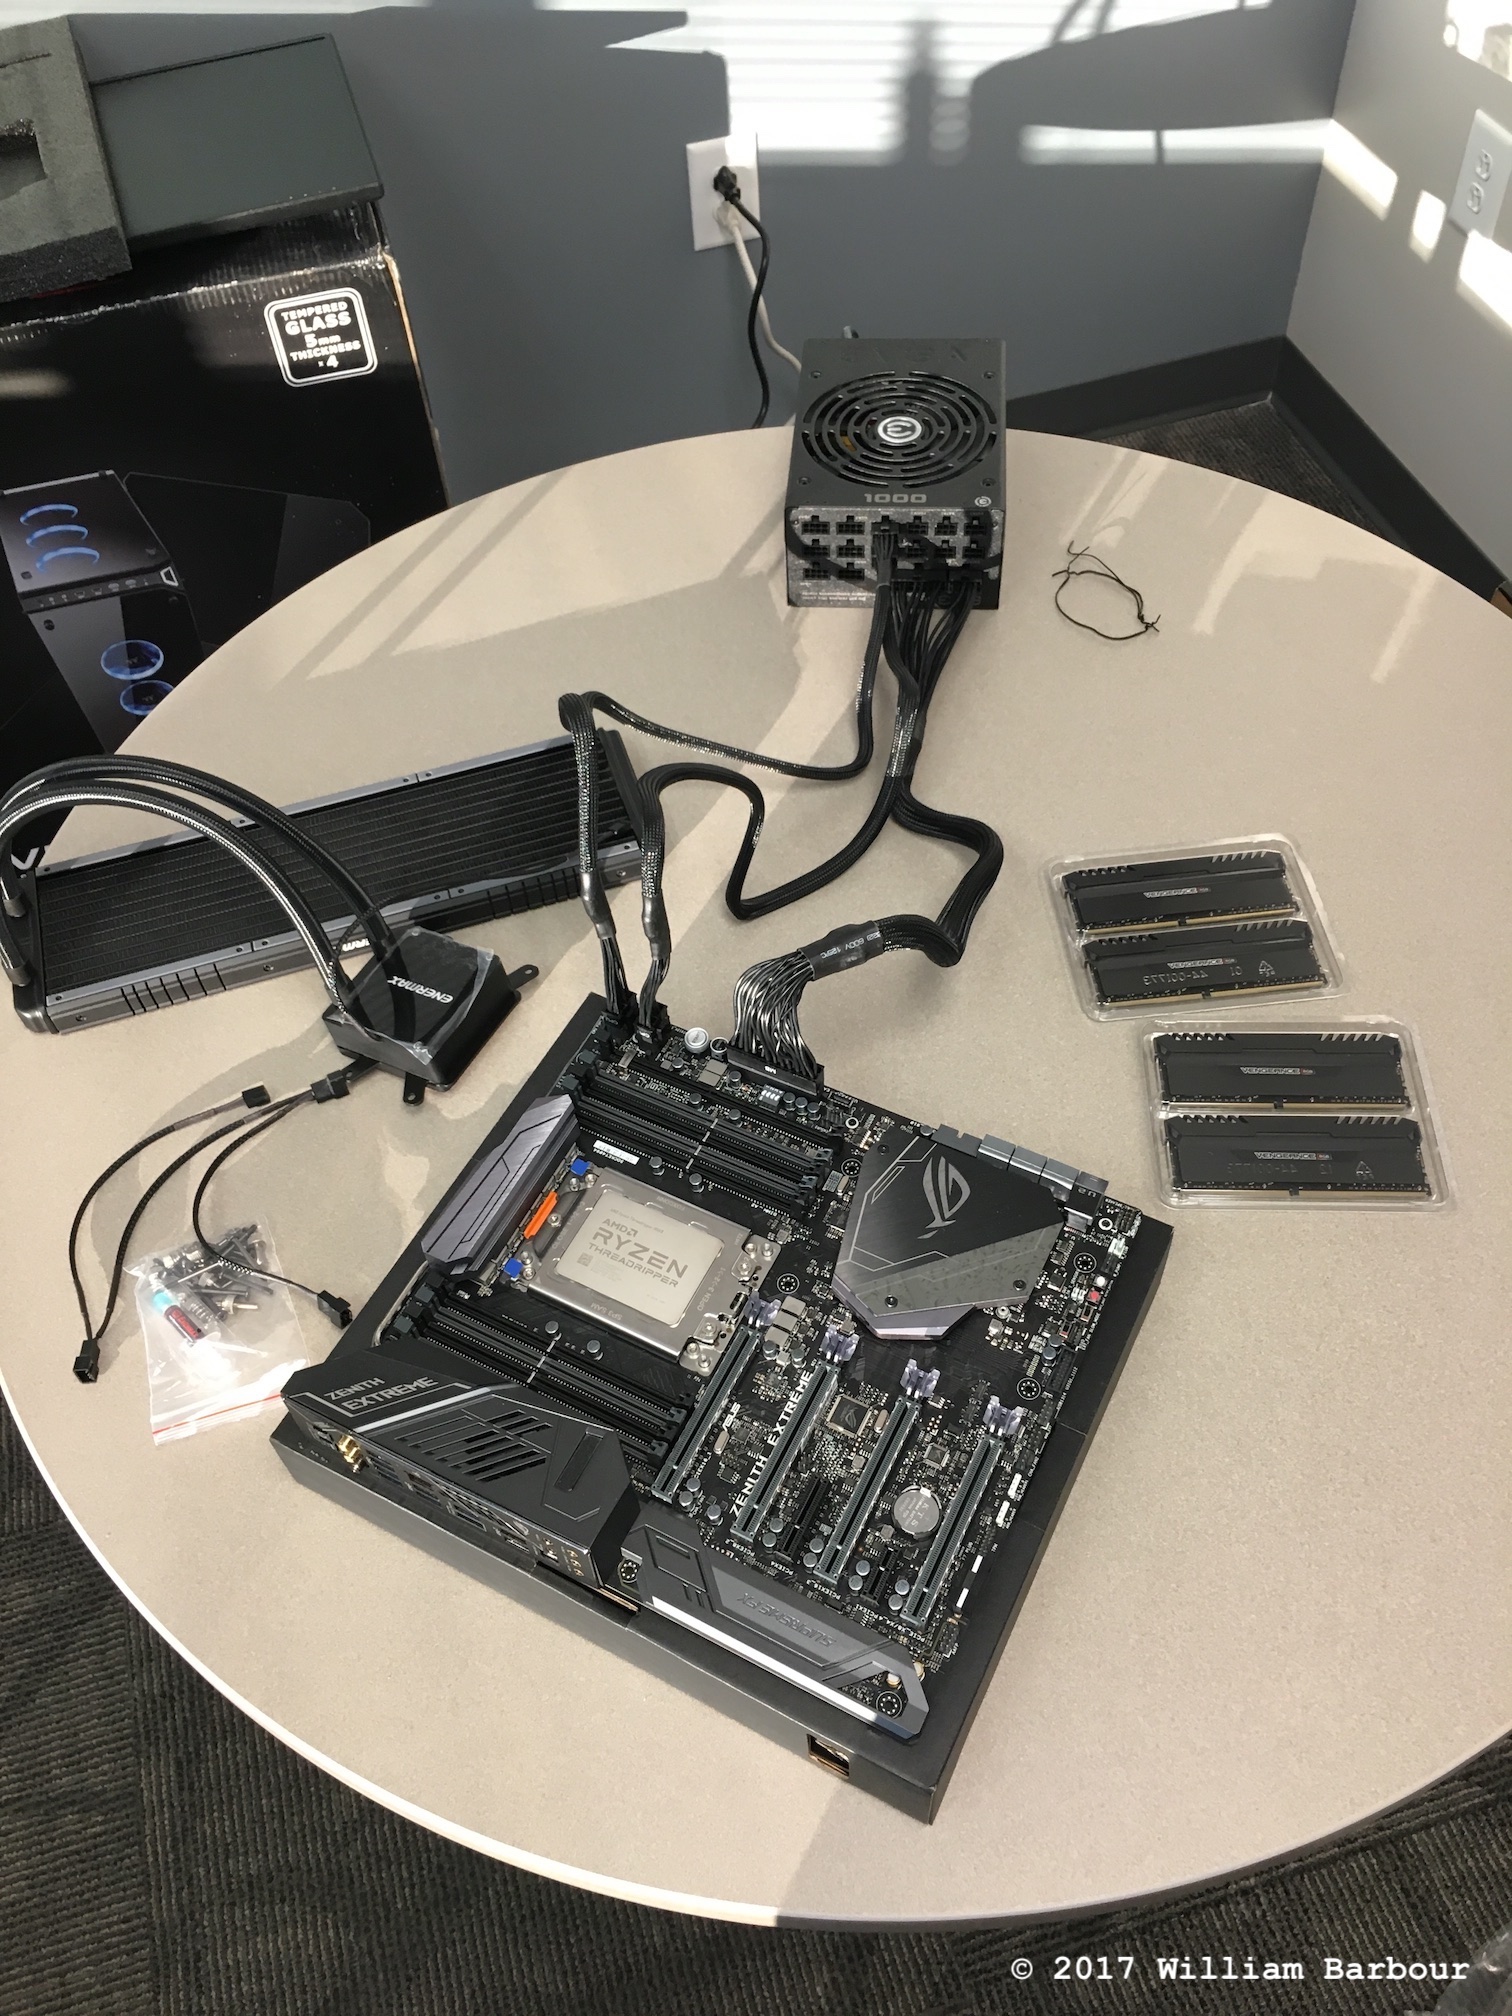
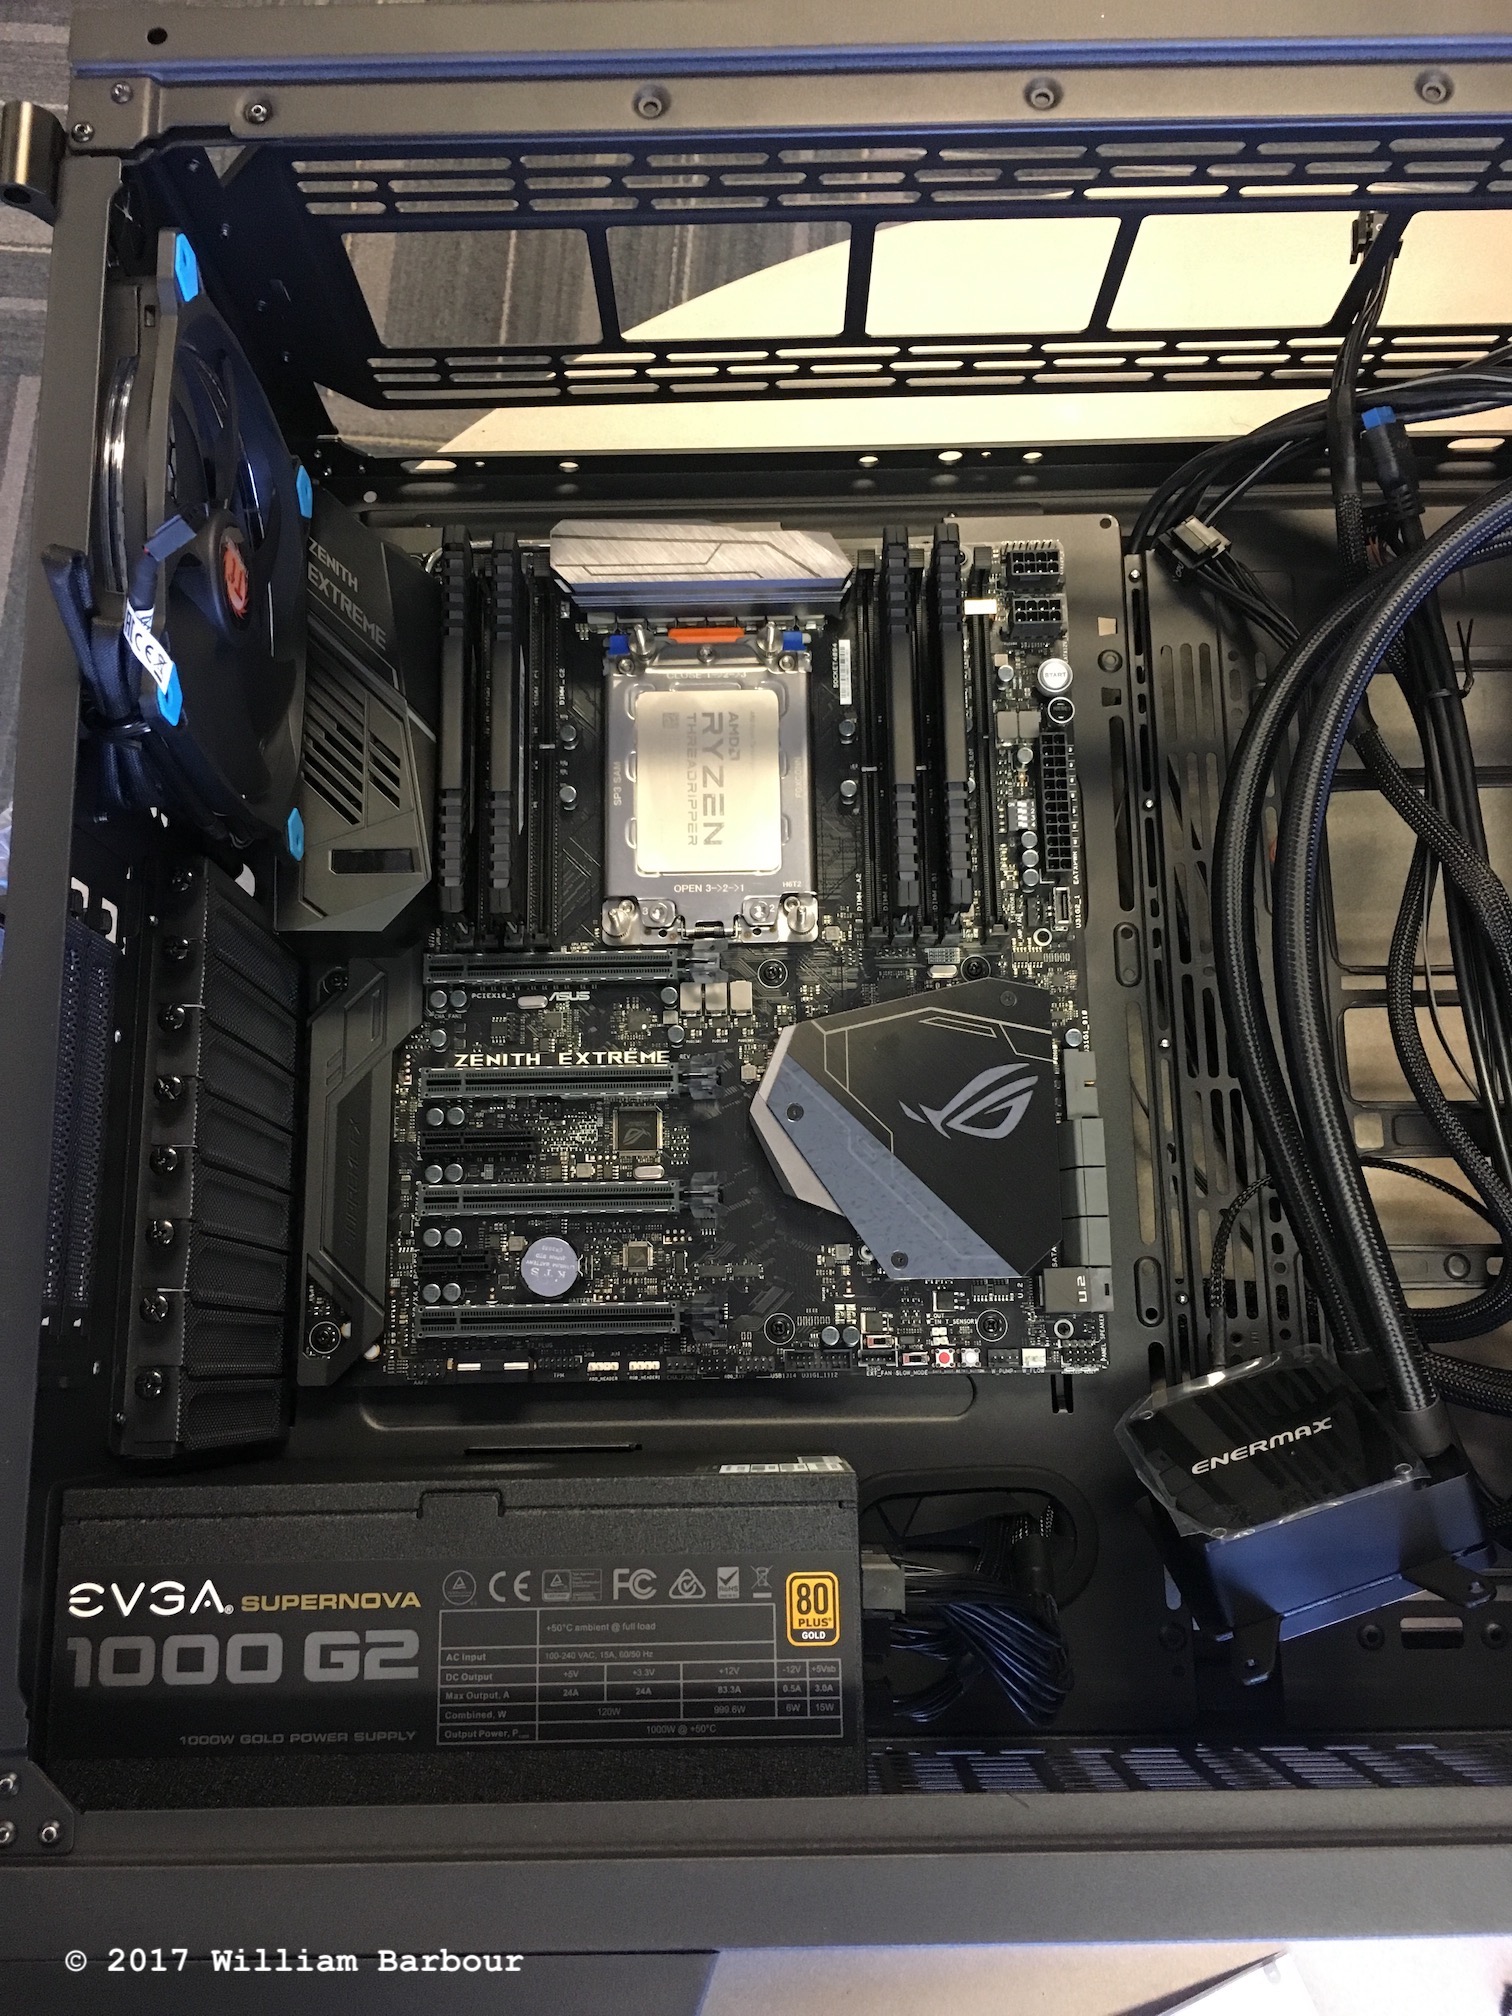
Test assembly
It is always a good idea to test components outside the case where assembly is painless. Sending a component for RMA is a lot easier when it’s not screwed down. I typically place my motherboard on the cardboard insert that comes in the box; components aren’t as fragile as they look2.
As you can see, the Threadripper CPU is absolutely massive. It’s dimensions are daunting, but it is also plainly heavy. We know that the heat spreader is soldered directly to the processor dies for better heat transfer (compared to thermal paste/adhesive), but I suspect that the heat spreader is considerably more robust than the typical processor. This complements the AIO liquid cooler that was used for the CPU, which has a full-coverage water block to take advantage of the distributed heat generated by the processor dies. AIO liquid coolers for smaller sockets vary quite little in performance, but it is clear that the heat dissipation capacity of this Enermax cooler is significantly higher for the TR4 socket3.

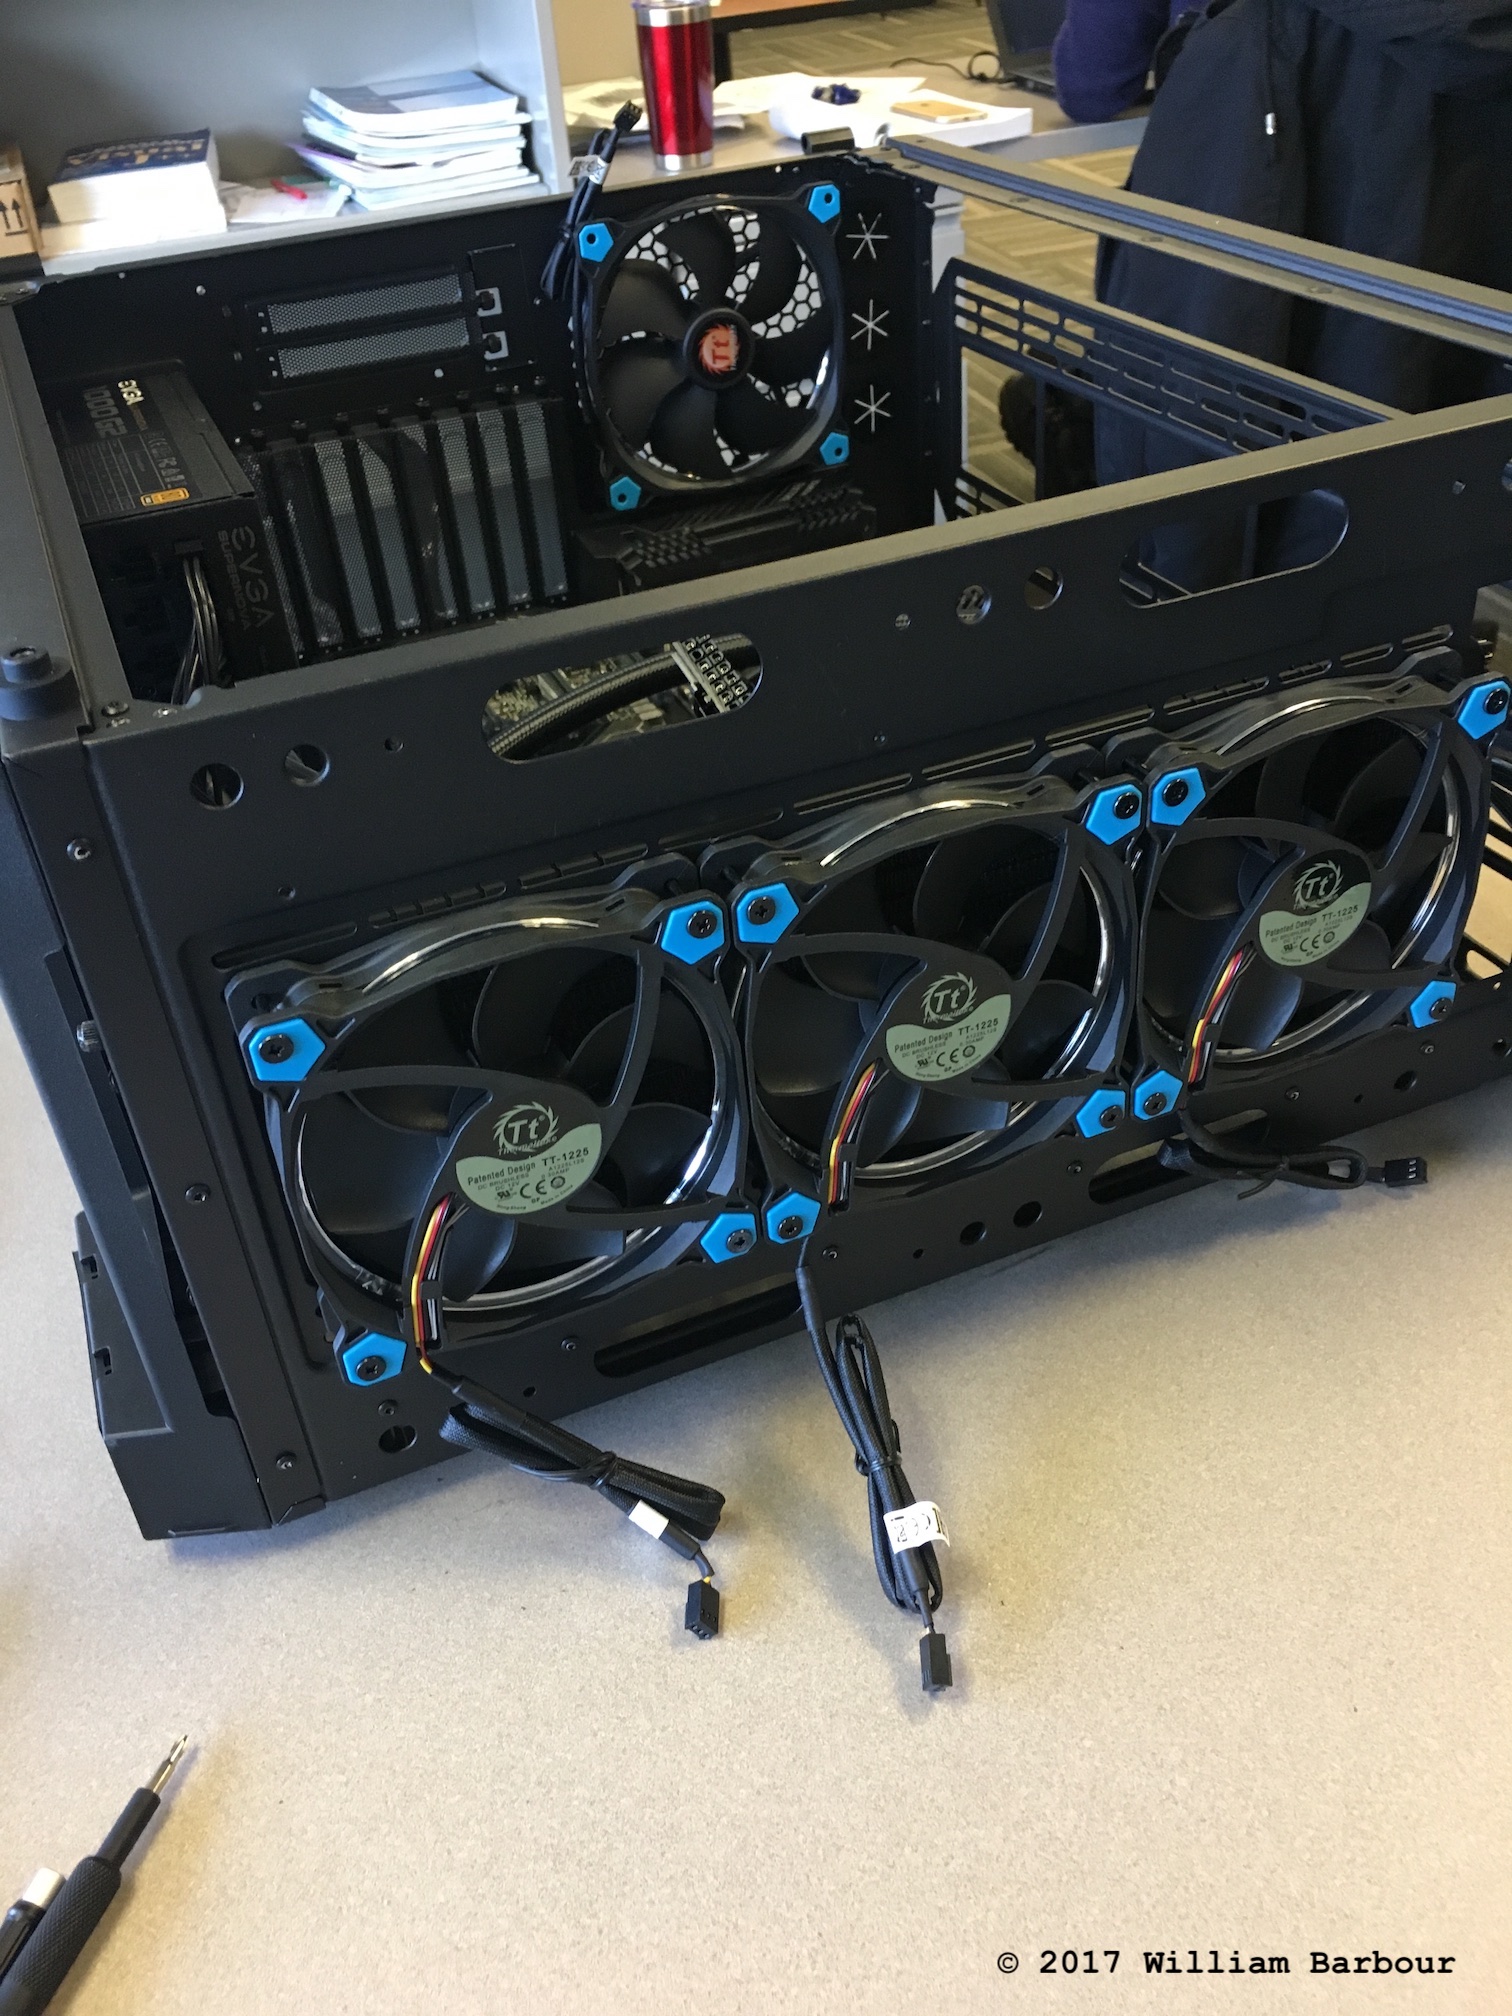
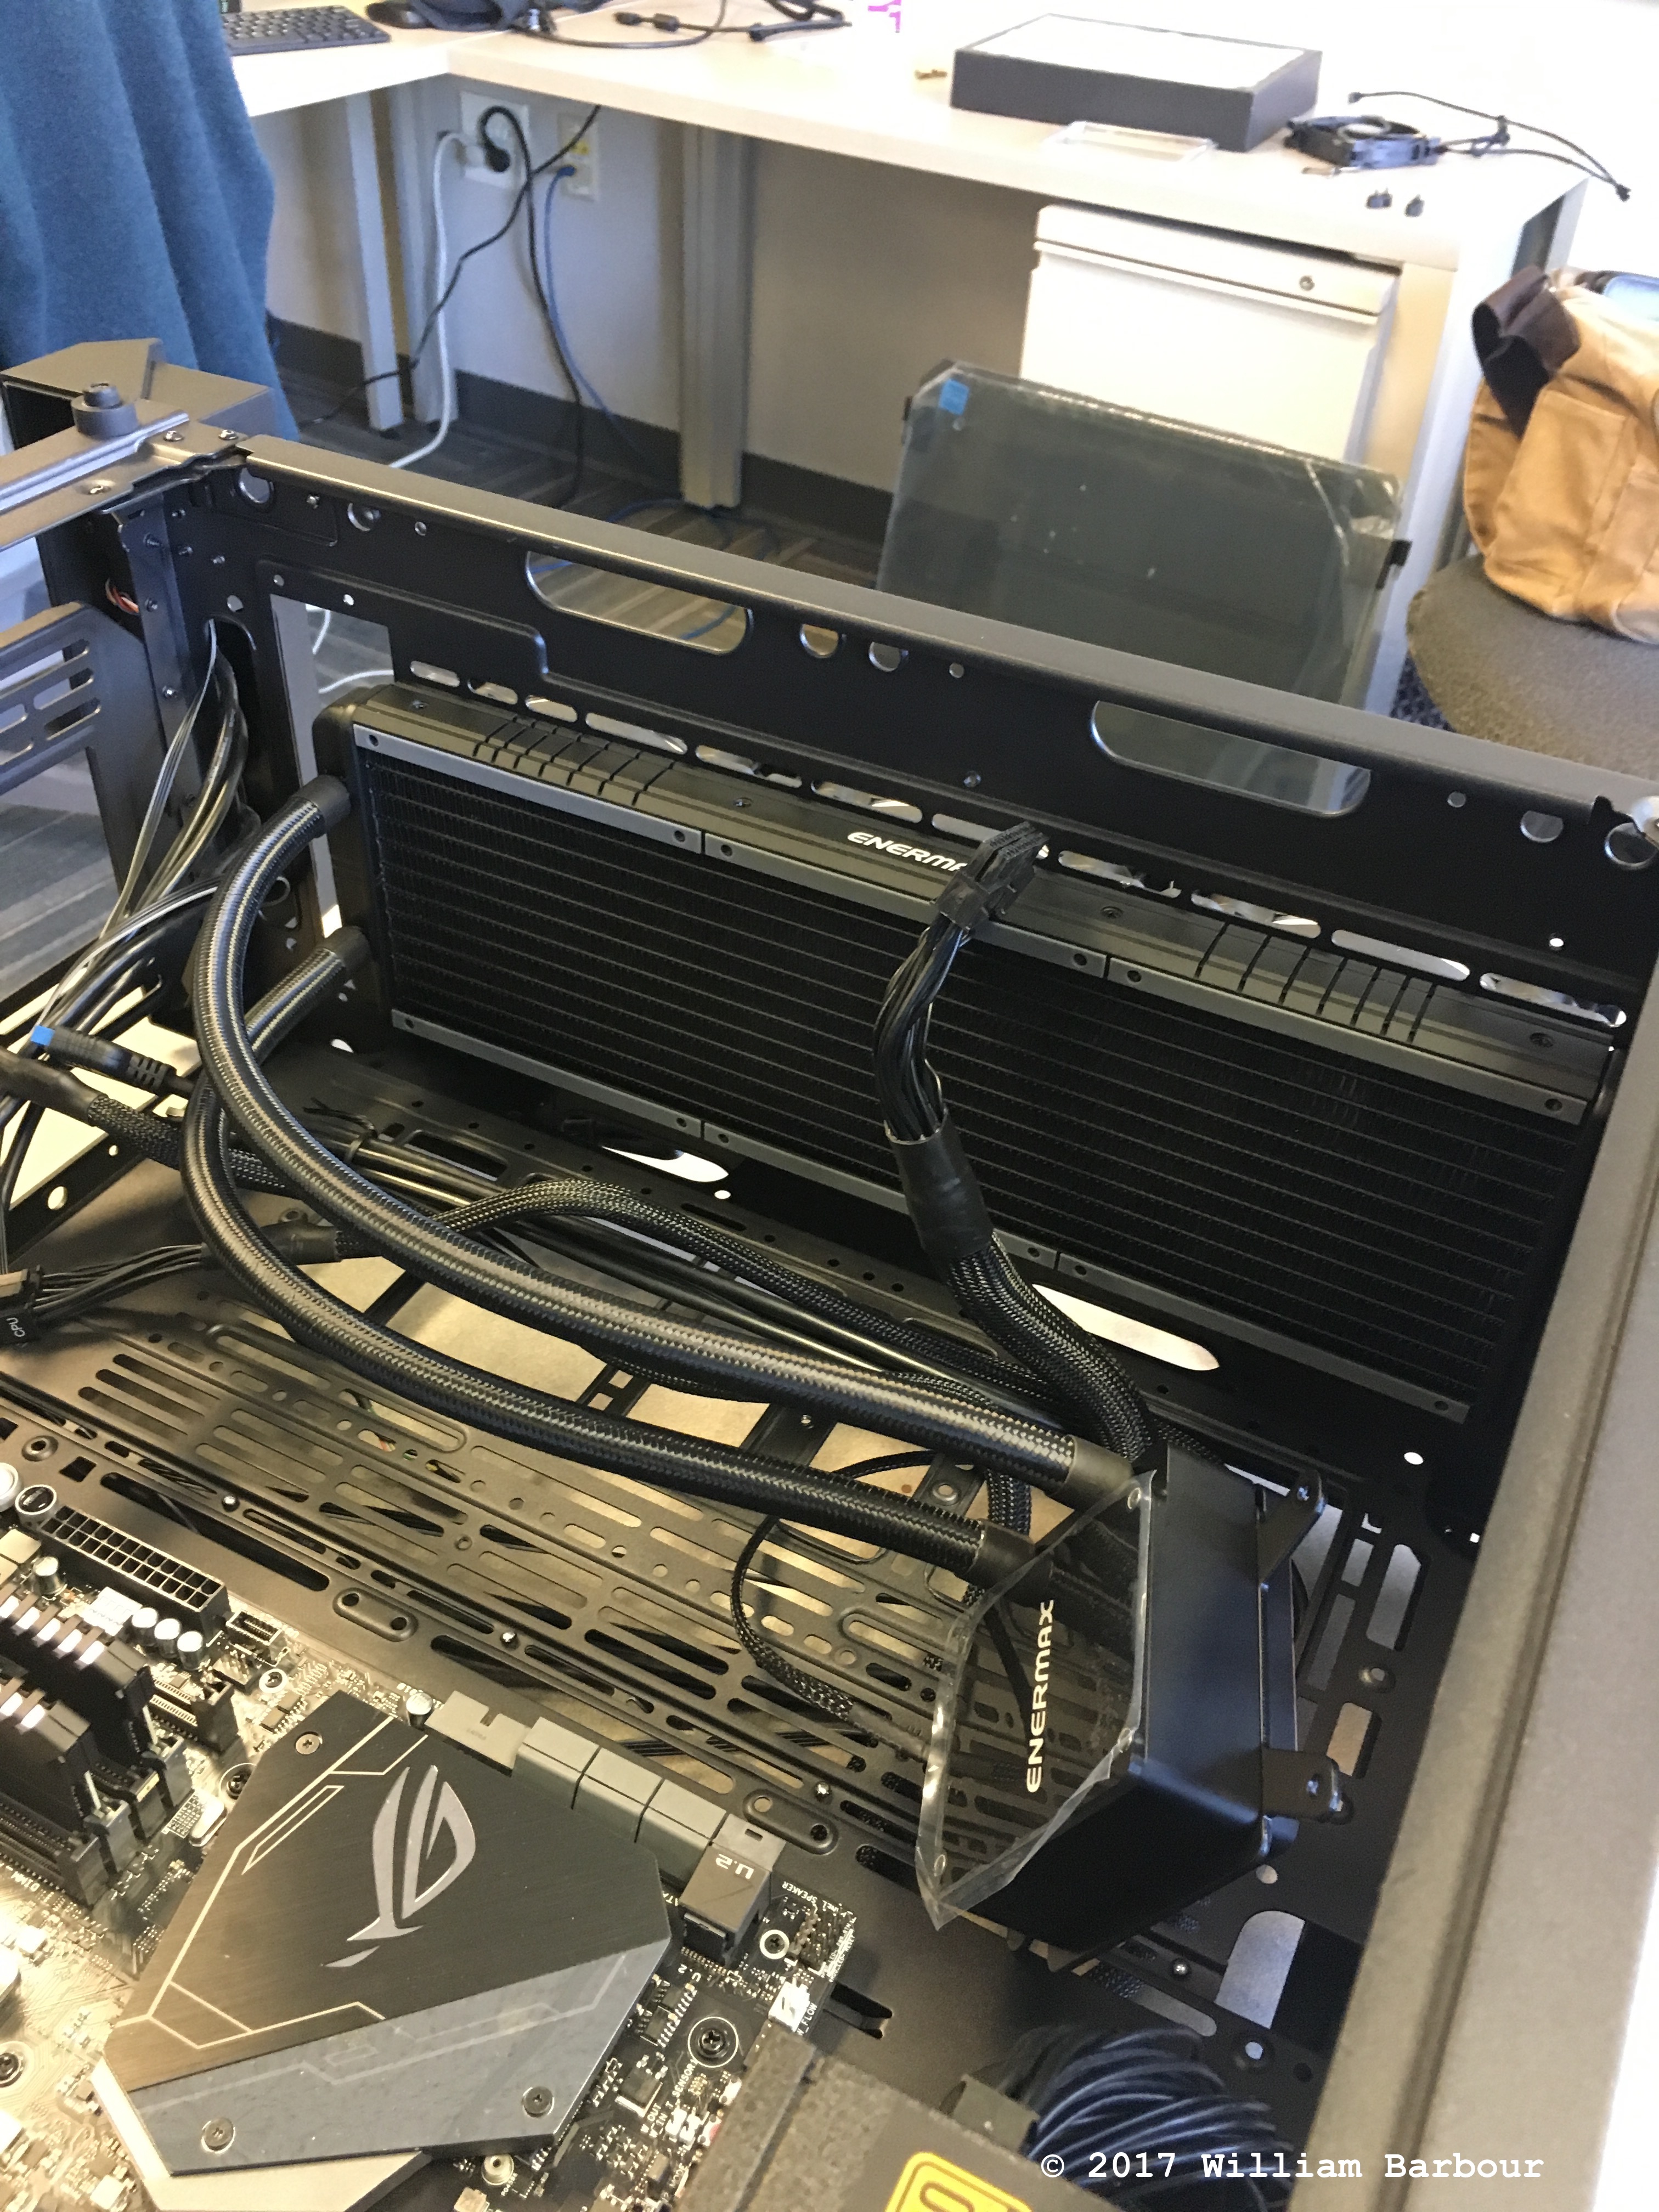
Final assembly
This was on the longer side of assembly times. The Thermaltake case was nice and spacious (massive, in fact) but a number of other factors contributed to a tedious installation. These included: separate fan extension board that came with minimal instructions for installation, long runs required for fan cables that dictated some placements, and crazy tight screws on the case for which I had only a tech-sized screwdriver (see Tools recommendations 1 and 2 below). I thought I had a lot of components, but this case could easily fit another hybrid GPU, 4-5 additional hard drives, and 1-2 additional fans. Airflow seems excellent (this has been a problem in some newer glass cases) and the build certainly makes a statement.

Aftermath
The BIOS on the ASUS motherboard was decent out of the box. I noticed a few stability issues, but these seemed to be cleaned up with a BIOS update that was rather painless via USB drive. I have not been able to get the RAM to overclock; the DOCP profile shows up in the BIOS, but the system won’t post after attempting to enable it for the rated 3466 MHz. I have not yet attempted CPU overclocking, but will possibly do so in the future.
Windows 2016 Server was installed as the operating system (hence why I refer to the machine as a server and workstation interchangably). The primary factor in the decision was supporting multiple simultaneous users. I’m aware that any number of other operating systems can do this, but Windows is supported by the technology staff. I generally prefer a Unix-based OS, but so far the Windows Server installation has been nice and clean, free of bloatware, and compatible with most Windows 10 applications.
Tools
There aren’t really that many tools required to assemble a computer. If absolutely necessary, the vast majority of components could be installed with a single phillips head screwdriver. However, not all tools are created equal; here are my suggestions:
- iFixit Pro Tech Toolkit - The screwdriver and bit set included with this kit is the best I have ever used. I have used these bits quite aggressively and they haven’t shown any significant wear, unlike the many others that I have seen round off after slipping on a single screw.
- Full-size screwdriver - Multi-bit ratcheting screwdrivers work well for computers (a full-length and stubby version can both be useful). Some screws, particularly on steel cases, can be far too tight and difficult to remove with a small screwdriver.
- Flush cutters - Useful for cutting wires, zipties, etc.
- Long needle-nose pliers or hemostat - Either can be used for installing cables in tight spaces.
- Box cutter or knife - Packaging for high-quality components can be stubborn.
- Zip ties, painters tape - Good for securing cables permanently and temporarily (while planning cable routes).
-
I tried a pair of these drives (Samsung 950 PRO) in RAID-0 configuration. The increase in bandwidth was nearly double, but the IOPS did not improve substantially (as was expected). Ultimately, the hassle with the BIOS settings and operating system compatibility was not worth the tradeoff. ↩
-
There have been many reports of CPU installation difficulty for the Threadripper socket (sTR4). Apparently, there are two socket manufacturers - Foxconn and Lotes - and screws on the former are consistently about a half thread too short. From what I felt when tightening the retainer on my Foxconn socket, it was far more effective putting pressure on the screw when I could support the socket backplate directly with my hand instead of flexing the motherboard if it were installed with standoffs or resting on the box. ↩
-
https://www.gamersnexus.net/hwreviews/3119-360-vs-240-for-threadripper-enermax-liqtech-vs-noctua ↩